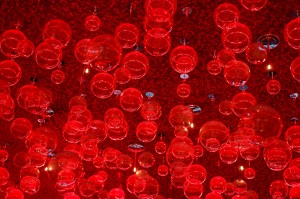
Ceiling fixture in the bar area at our hotel
One of the live auction items at a fundraiser for Season’s Hospice was a three day trip to New Orleans. It sounded like fun – I’d never been to New Orleans, or even Louisiana – so I bid on and
won the trip. (I wonder why they call the highest bidder the winner…) We decided to try to plan the trip for mid May before it becomes really hot along the Gulf, and also see if we could be there for our anniversary. It worked out brilliantly, and the weather was actually terrific.
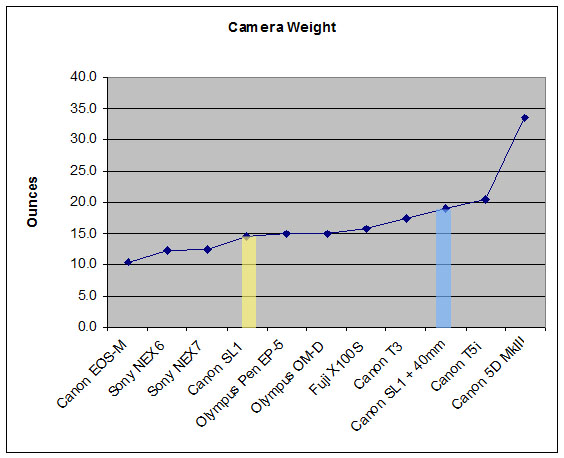
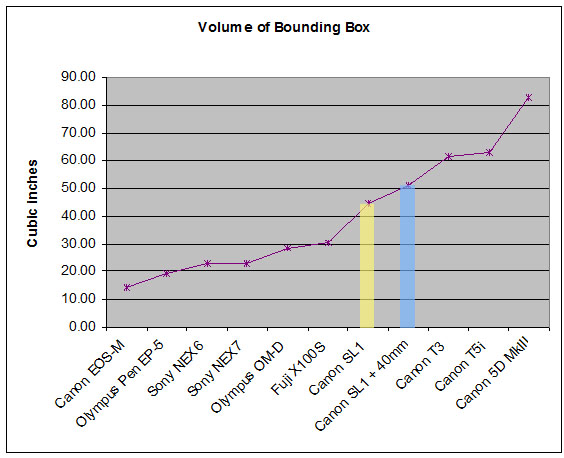
I started thinking about what photo gear I wanted to drag along. With it being a short trip and not one specifically for shooting photos, I began to consider perhaps renting a smaller camera. I could travel lighter and not be weighed down by the camera. There are lots of options especially in the mirrorless category (as opposed to DSLR which flips a mirror up to open the shutter). Some I hear about a lot are the Olympus OM-D and Sony’s NEX-6 and NEX-7. The Olympus is a micro-four-thirds style. Reviews have been very good, and the MFT cameras form a multi-manufacturer system allowing you to use any MFT lens on any MFT camera. The Sony uses an APS-size sensor which is the same size as many DSLR camera’s use, and a bit larger than the four-thirds sensor. For all of these, there’s no optical viewfinder. Sony reportedly has a very nice electronic viewfinder.
I’ve also been hearing good things about Fuji’s X100S. It’s also mirrorless, but it also has only one noninterchangeable (but fast) lens. Like the Sonys, it uses an APS size sensor. Decisions, decisions.
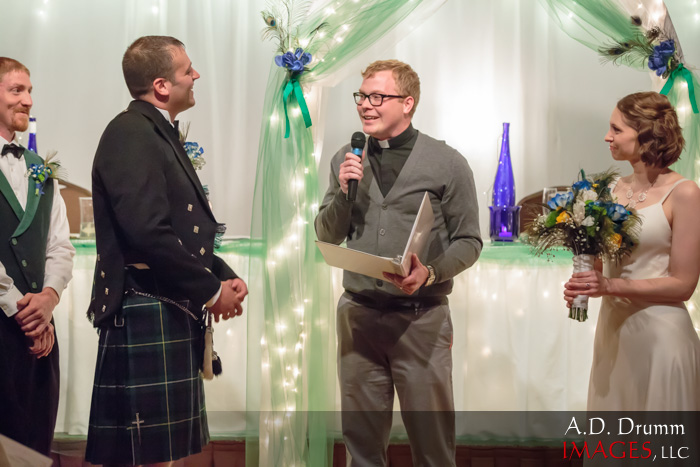
Then I had something of a revelation. Canon recently announced two new cameras in its Rebel DSLR line: the T5i and SL1. Internally, they are similar. The T5i carries on the Txi line. But the SL1 is sort of a new beast. Canon miniaturized many of the components to create the smallest DSLR on the market. The little light bulb that went off for me was, gee, I could rent one of these – only just arriving at the rental places very recently – and attach my tiny 40mm f/2.8 pancake lens. And I could take my 50mm f/1.4 for a bit more reach if needed. Using it with the 40mm, I’d have pretty much the smallest possible DSLR/lens combination.
What’s more, I know my way around Canon DSLRs pretty well. The set up would not be pocketable, really, but I’m not sure how well an X100S would fit in my pocket either. And any of the other cameras would require me to also rent a lens. The SL1 has Canon’s latest 18mp sensor, just like its big brother, so I should expect decent image quality.
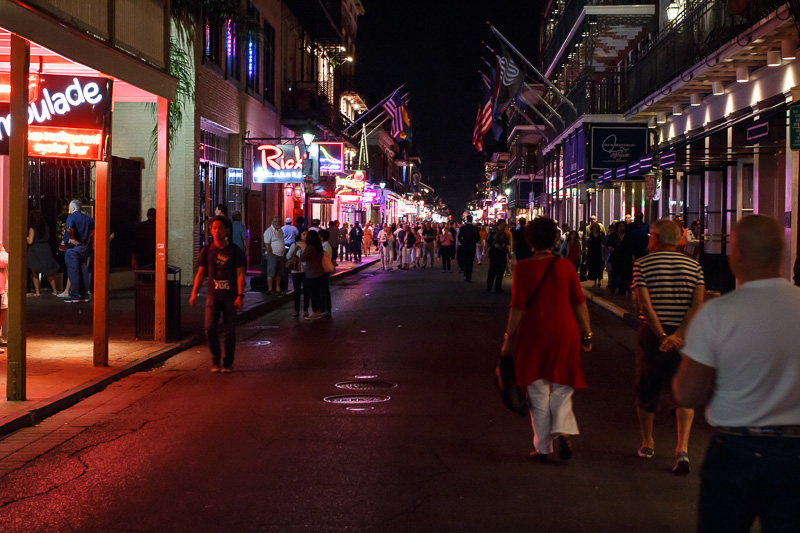
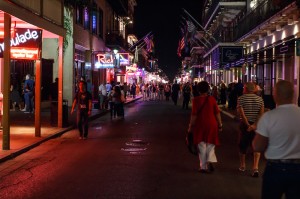
Canal Street at night
For my Grand Canyon trip, I rented a couple items from
Lensrentals.com. I’d had good luck with them, so they were first on my list. It turned out they also had the SL1 when I needed it. I rented the camera (and one extra battery) for 7 days to give me the weekend to try it out and learn how to navigate it. I was pleasantly surprised when I received the camera to find they included a Lowepro case as well! In fact, they do show that a camera bag is included, but I hadn’t noticed. The case worked great.
It didn’t take me long to figure out the camera controls. There’s a nice mode dial on top so flipping between Av and M was simple and quick. I’ve recently discovered the usefulness of the Q menu on my 5DIII. There are a couple settings that are just much easier to set there than hunting through the regular menus. I tend to forget what some settings are called, so finding them can be tedious. Firing up the Q menu on the SL1 is a snap. And, even better, it has a touch screen! It’s fast and easy, and it supports multi-touch as well. More on that later.
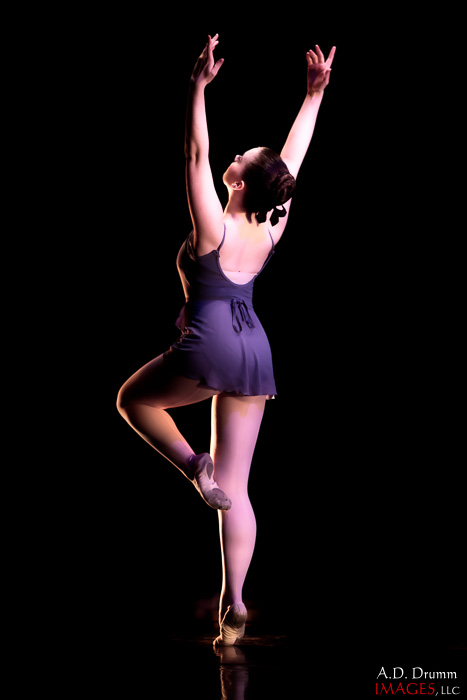
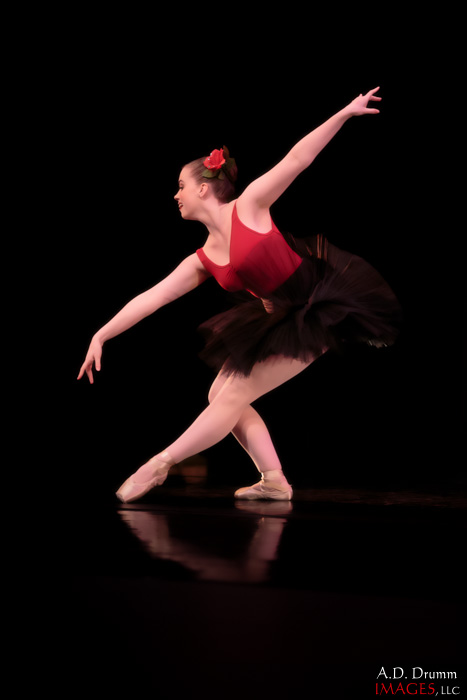
We attended a dance recital last Saturday. I decided to throw the camera into the fire of stage photography to see what it could do and how it handles the rigors of low light. It’s not the 5DIII. But I didn’t expect it to perform that well. Yet, I did grab a few pretty respectable photos. Test number one passed, and I was able to mostly maneuver around the controls.

So, here is my little review of the SL1. This is based on using the camera for real, and based on how I use a camera. I didn’t set out to review all the features, try every setting. As I mentioned above, I shot in Av (aperture mode) and M (full manual). I didn’t try even one of the scene modes. I didn’t shoot any video. (Well, I did a few seconds accidentally once, but I deleted it right away!) my goal was to take some hopefully great shots with a tiny camera and no back or shoulder pain.
Let’s move on then! First, let me cover a few things that bugged me. The biggest problem I had was accessing the exposure control button on the back of the camera next to the LCD without looking. The position seems a little awkward. And, I use this a lot. Actually, on my camera, there’s a big wheel. In manual mode, the little wheel by the shutter adjusts the shutter speed and the big wheel on back adjusts the aperture. In aperture mode, the little wheel sets aperture and the big wheel adjusts the exposure compensation. Either way, I’m fiddling with both. On Canon’s Rebel line, there is only the small wheel. You press and hold the exposure button (not sure its official name) while turning the small wheel to replicate the big wheel’s function.
Just in general, I prefer having a direct control. That said, the placement of the button feels odd to me. Probably something I’d get used to, and I was certainly able to hit it more readily at the end of the trip than at the beginning, but I still had to think about it. There’s also the on/off switch. It’s placement, next to the mode dial, is just fine. But it has three settings – off, on, and video. So, this is how you turn on the video feature. I like to just push the switch fully, so I’d occasionally enable video mode by accident. Then, when I reached for the little exposure button, I hit the record button by mistake. It’s in a nicer, easier to hit with my thumb, location. Probably great for video shooters. This is how I accidently recorded a few seconds of video. I usually was able to hit the ON position okay, so in those cases, I’d press this button and turn on Live View. Oops.

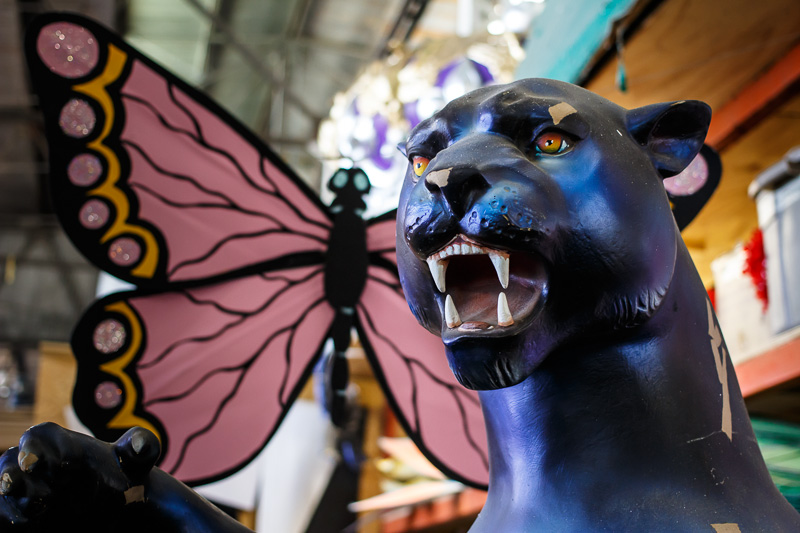
At Mardi Gras World
Okay, now on to what I liked. What I loved was the size and weight of the camera, particularly with the 40mm attached. It really was freeing. With the camera strapped over my shoulder, I could barely sense it was there. It’s small, but fit my hand well. I always felt my grip was very secure. The shutter button is right where it needs to be as is the small wheel. I never hunted for those. The viewfinder is clear. The LED display inside the viewfinder seemed a bit dim in daylight. Not sure if there’s a setting for that. But it is very familiar looking.
The LCD display is high resolution and beautiful. I walked through all the menu settings before the trip and was able to set up most everything to the way I like to shoot. I disabled the Info display, for instance. And set the auto-off time to its highest setting. One time, while reviewing photos, I accidently brushed the LCD with my finger and the image moved. Oh, yeah! Touch screen. Sure enough, you can swipe the display to move from photo to photo. It does multi-touch, so you can use two fingers to zoom just like a smart phone. It’s very intuitive.
Using the Q display plus touch, you can change settings very quickly. For a tiny camera without a ton of dedicated buttons, this is hugely helpful.

These beignets were not just fried dough. Yum!
I shot in raw mode, of course. Used my 128GB SD card – I use it as sort of an immediate backup in the 5DIII. I didn’t need to worry about running out of space. This wasn’t a photography trip, so I didn’t expect to be taking thousands of images anyway. Auto White Balance does a respectable job, but it doesn’t want to run the WB all the way to almost blue that’s needed for some dimmer, tungsten-lit places. Lightroom takes care of that quickly, though. My iPad didn’t like the SL1’s raw files. I switched to RAW+JPEG for a while, but the iPad’s import software didn’t like those raw files on the card at all. Or maybe it can’t read SD-XC cards?
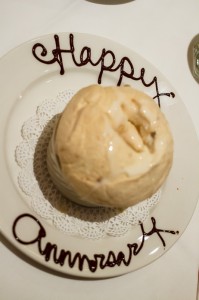
Bread pudding served as a soufflé.
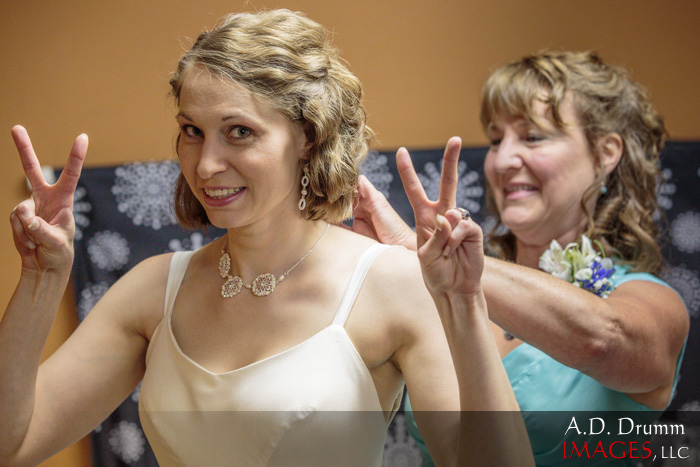
I included a range of photos here that show how well the little SL1 handled its job. I hate on-camera flash, so I didn’t use the built-in flash much, but I did take a shot of Lynne in Mardi Gras World using flash to add a little extra light to her face. Took me a couple minutes to find the flash exposure compensation, but I did eventually. Sometimes, my initial reaction when I didn’t just see something I was looking for was, “does this camera have this feature?” It almost always did, whether I found it or not. One I never found until I came home was exposure bracketing. My problem is, I forget how Canon labels it. On my camera, I have that assigned to the User menu, so I don’t have to hunt for it.

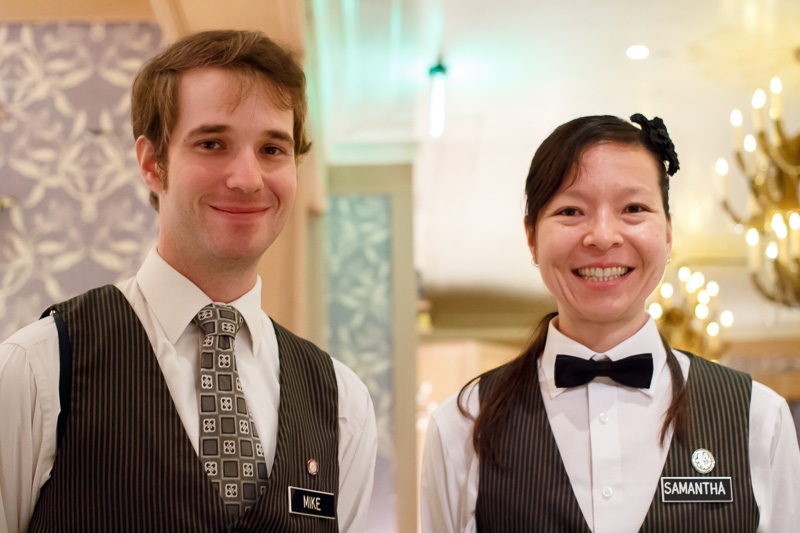
Samantha and Mike at Commander’s Palace in the Garden District
There were a couple of surprises. Going through the menus, I noticed the GPS settings. So, this little camera can use Canon’s GPS unit like I used in the Grand Canyon. This is cool, because you can just attach it to the hot shoe and you’re good to go. No built-in GPS, but the next best thing. The SL1 also has quiet shutter settings like the 5DIII. I was very surprised by that, and I used this mode several times: when I shot at the dance before the trip, shooting inside the St Louis cathedral (it just seemed appropriate), and during the jazz performance at the Preservation Hall. I use this mode on my camera for all my theatre live shoots to help avoid distracting the actors. It’s not completely silent, but it’s very quiet. I was pleased to find this setting on the SL1.

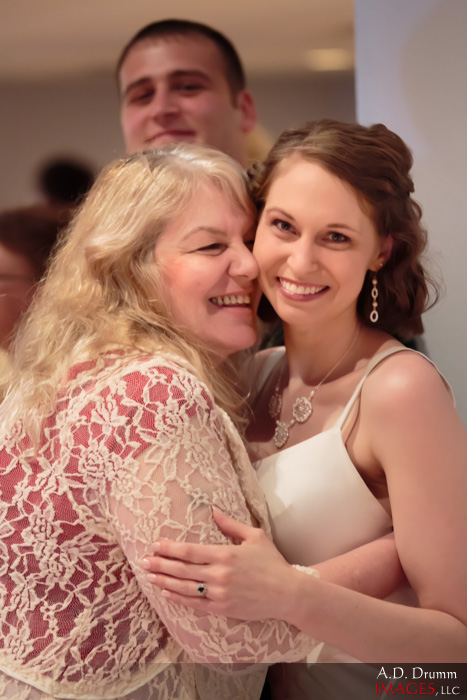
How was New Orleans? It was my first time there, and I really enjoyed the place and the people. We had great service and terrific food. The food must be the lasting influence of the French. I decided to take photos of our meals, and I did pretty well but often started to dig in before I remembered the camera!
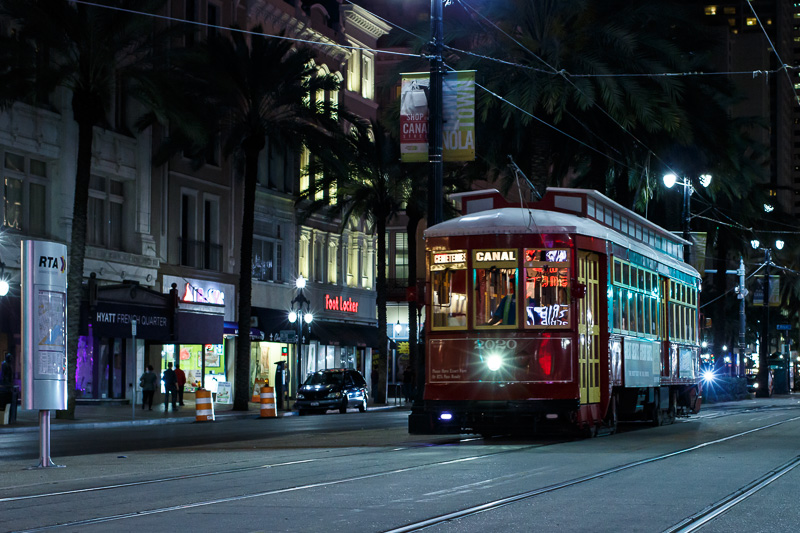
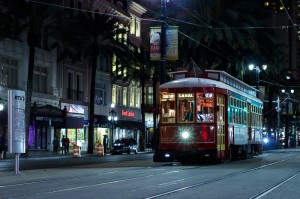
Looking at some of the photos I’ve included here, the hotel, Renaissance Pere Marquette, was nice, had a terrific staff, and was more convenient than we expected, only a block from the two main streetcar routes. We were a block and a half from Bourbon Street and the French Quarter. That street comes alive at night. The streetcars are fun and handy. They cost $1.25 to ride, but an all-day pass is $3. What a deal!
Lynne heard about and wanted to go to Mardi Gras World. It’s a working center for building props and floats for the parades. It was very interesting – the video and our guide, Sam, were informative. We learned a lot about Mardi Gras we didn’t know. There were a few of the artists in the warehouse drawing and painting. And tons and tons of props as well as many floats being stored until they are refitted for next year.
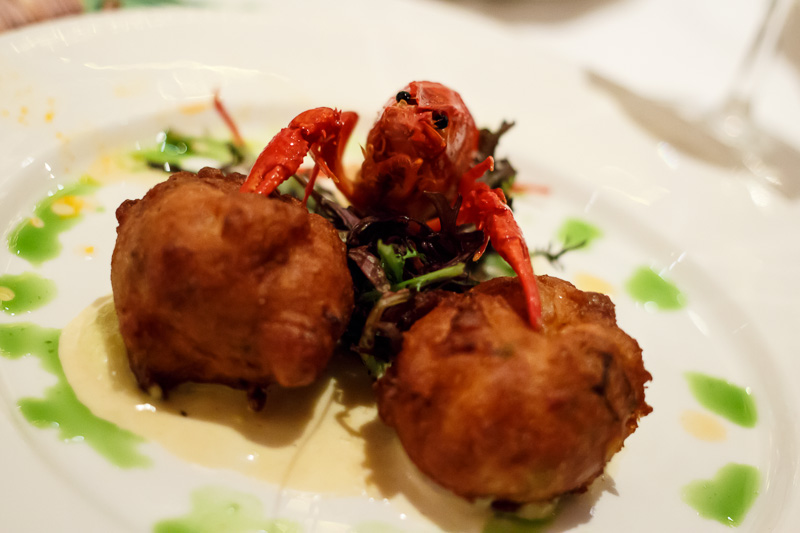
We had a six course meal – all chef’s selections – at Commander’s Palace in the Garden District. It’s only a couple blocks from a streetcar stop. Samantha and Mike were our servers. After I finished the first course, I remembered the camera! We had our first crawfish, and a helpful patron gave Lynne directions for opening her crawfish when she was having trouble. We had mentioned it was our anniversary, so at dessert time, we received the designated dessert, but also this “bread pudding” which was soufflé-like, airy and wonderful.
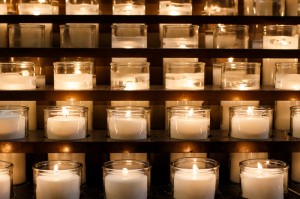
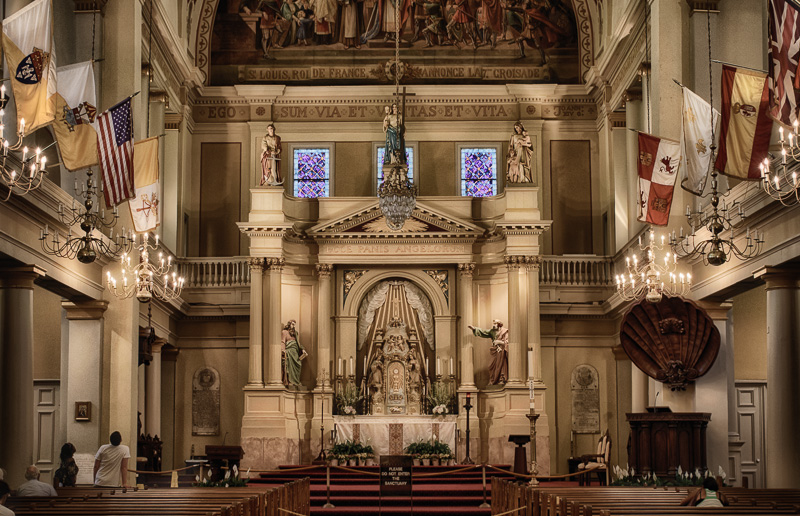
Candles in St Louis Cathedral
There is a large square area in the French Quarter and at its head is St. Louis Cathedral. I shot a few bracketed photos inside to later post-process as HDR (like the one I show here). This is where knowing how to set the camera for auto-bracketing would have been helpful! But I managed okay. The current crop of HDR programs do pretty well with hand-held shots, automatically aligning them. You tend to move more when you have to adjust the exposure manually for each shot, but they still seem to do fine. It’s rather amazing when you think about it, but it’s nice to know it will work.
As most large Catholic churches, there were many votive candles that can make for some interesting photos. I adjusted the white balance in Lightroom to make the candles white, but it just looks wrong that way. So, I then move the slider to the right, toward yellow, just a bit to bring back the warmth of the candles. It’s still much cooler than the camera’s auto WB did.

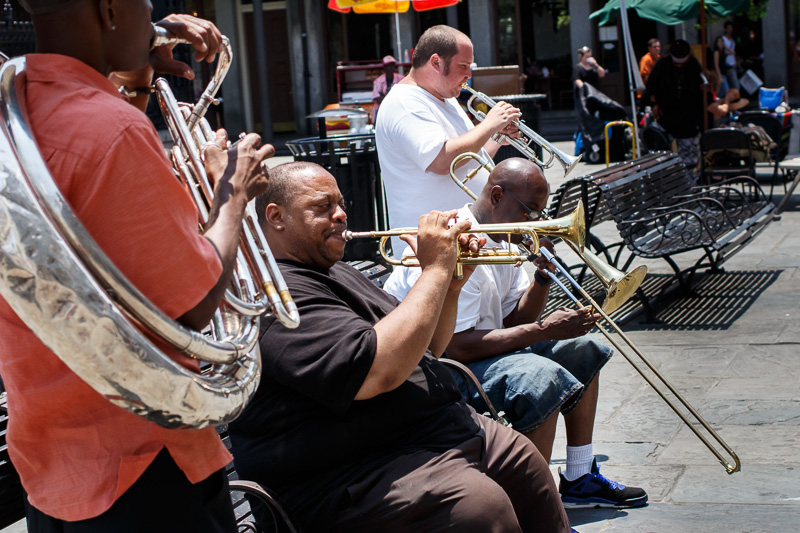
Outside the cathedral was a six-piece jazz band along with their inverted hat on the pavement in front of them. They were great. I sat and listened to them for quite a while and had no problem throwing some money into the hat. Definitely worth it. I really enjoy this sort of jazz, and I’m partial to horns anyway.

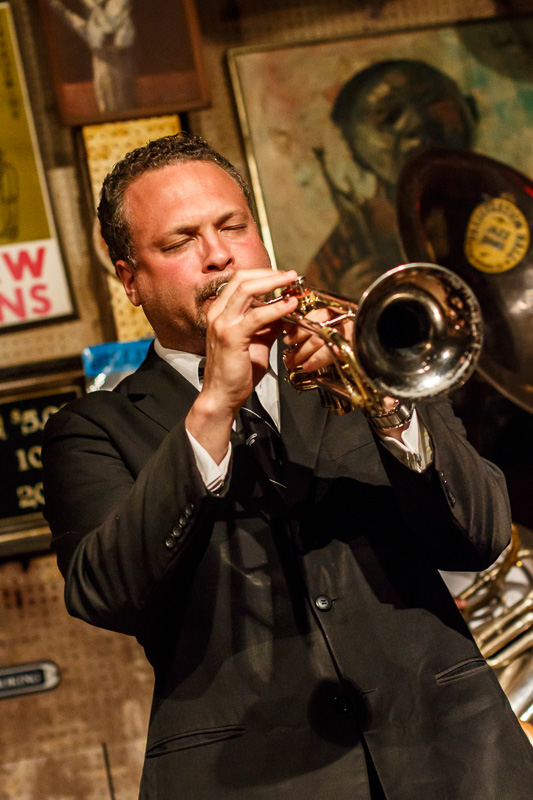
Concert at the Preservation Hall of Jazz
We had a couple tickets to the Preservation Hall of Jazz. This is basically an old house with a small area – maybe once the living room or living and dining rooms – devoted to the live music. There’s no air conditioning, and not much seating. There are a few benches, some cushions on the floor, and standing room behind. The gigs are 45 minutes long, and there are three of them per night. The Preservation Hall Jazz Band played the night we were there. It was warm and crowded, but it was also incredibly intimate – by far the best way to listen to live music.
The trip was short but very fun. The little SL1 did admirably, meeting all my expectations. It was great having a light, easy-to-carry camera that I also knew could do what I wanted it to do. Better than a mirrorless choice? I can’t say for sure since I’ve still not used one. It’s still too big for most pockets, but I’m not sure something like the X100S will fit a pocket either. For me, it was pretty nearly perfect. And, using the 40mm lens was somewhat freeing, too. We get caught up in all the choices a zoom provides. This takes me back to my early days of shooting with a 35mm film SLR, when my only lens was a 50mm normal lens. You made due, and still could bring back some photos that make you happy.
By the way, don’t forget about the renting option. If you need an expensive lens for only a short time or if you want to try a new camera before you buy it – or, maybe, to have a small light package to carry around on a short vacation – give rental a look. I can certainly recommend Lensrentals.com – they came through beautifully for me.