A.D. Drumm Images, LLC – Landscape, Portrait, and Fine Art Photography in Rochester MN Photography

February 22, 2012

Playing with High Dynamic Range

Filed under: General photography — Tony Drumm @ 7:08 pm

When we’re out shooting, especially on sunny days, the range of light from shadows to highlights can be more than our cameras can cope with. Back in the film days, we talked about the latitude of a particular film, and each brand and composition of film reacted to light differently and displayed a different amount of latitude. I shot a lot with Kodachrome which was known for having a rather low latitude. This meant if you exposed for the highlights, the shadows would basically go black. It sometimes made it tough to get the exposure you wanted. But, Kodachrome was saturated and beautiful, so we’d put up with the inconvenience. Generally, slide films were less forgiving than print film.

In digital, we talk about dynamic range. As an electrical engineer, this has an immediate connotation in my head. I know exactly what this is. I’m not sure non-engineers are so blessed, and I’m not sure why that engineering term became the one we use. But, there it is!

Dynamic range is essentially the range of intensities of the light present in a scene or, where it counts, on the circuits of the sensor in our camera. If that range exceeds the sensor’s ability to convert the various intensities into different values – numbers – then we have the same issue we had with film. We can capture only part of the range and have to decide what’s important, the highlights or the shadows. If I’m shooting a person’s face, then I will usually want that face well exposed, the rest of the scene gets what it gets.

Software comes to the rescue. For quite a while, we’ve been able to play games like taking a shot that exposes the sky correctly and another that exposes the foreground correctly, then combining the two images by cutting along the horizon. This could even be done in a darkroom from film. On the computer, it is easier.

But we have tools now that go far beyond this, combining multiple images at a fairly fine level to create one resulting photograph. It’s commonly known as HDR, or high dynamic range. Technically, the technique is known as tone mapping, but names aren’t really important.

It’s an interesting technique, and it’s pretty popular now. Some folks love it, some hate it. Some photos use it subtly to maintain a natural look displaying just a bit more detail that normal, some flaunt it and take it to extremes.

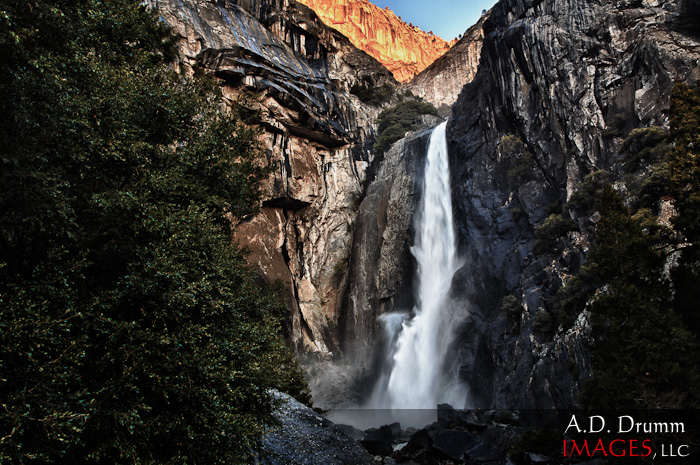
I’ve not used the technique a lot. For a long time, I couldn’t decide where I fell on the love it/hate it scale. I used it for the first time in any serious way with a couple shots I took in Yosemite. It didn’t hurt that RC Concepcion was there, and he literally wrote The HDR Book. More recently, at Rick Sammon’s workshop, Rick suggested the alley where we were shooting had some good possibilities for HDR.

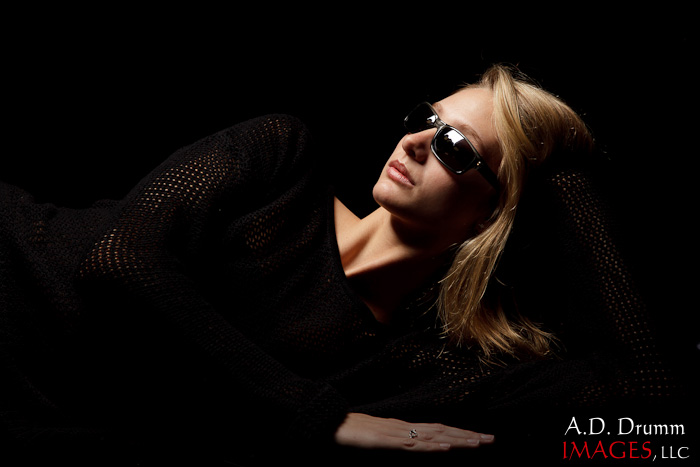
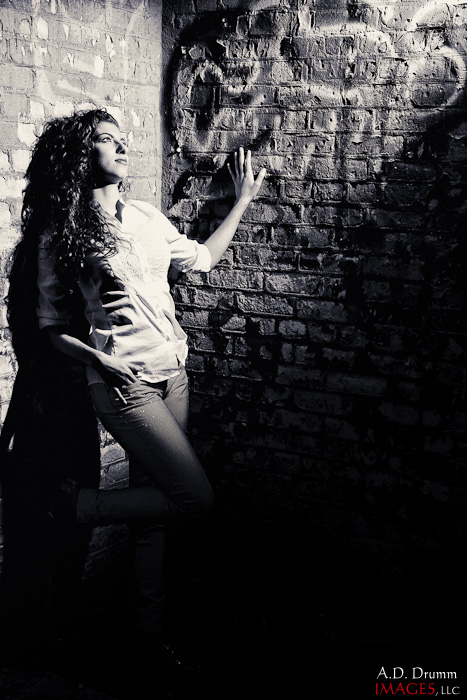
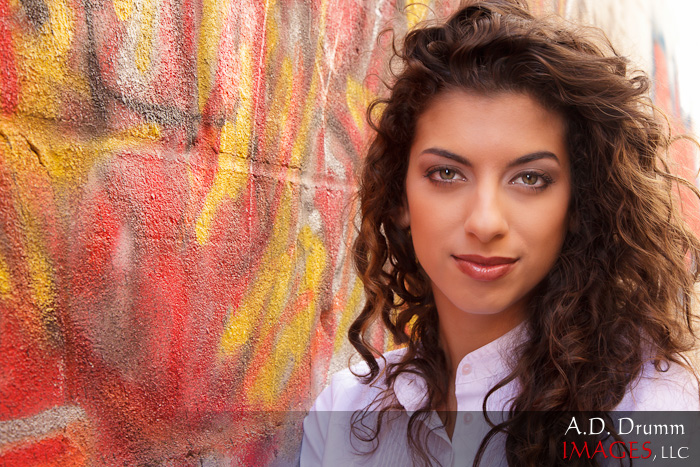
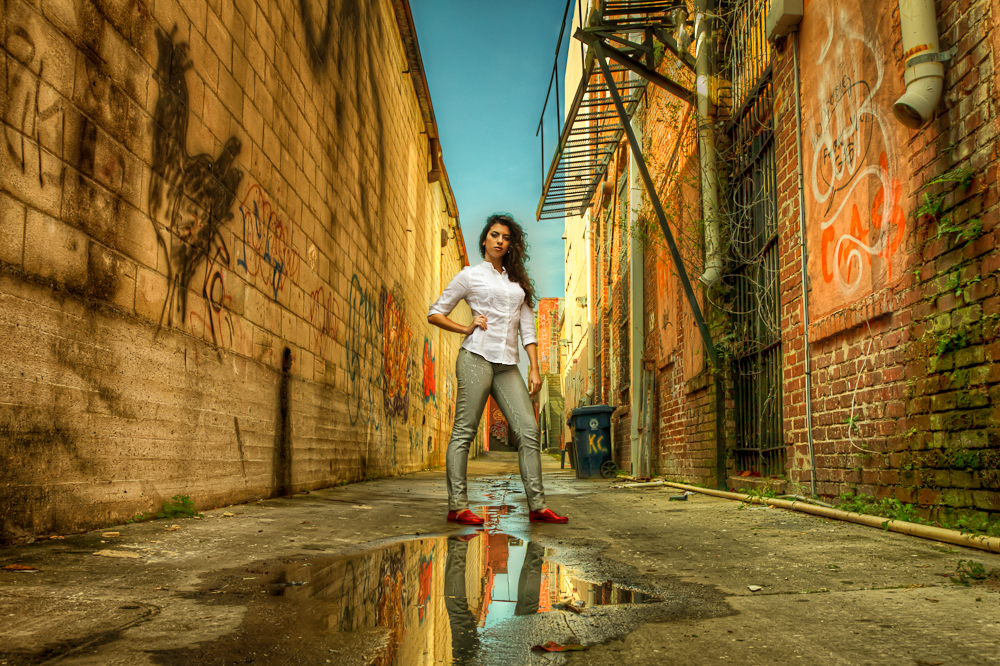
I finally decided to go ahead and buy one of the HDR programs, Photomatix. There are a handful of often cited programs – Photomatix is one of the more popular and it’s been around long enough to have become rather good and rather sophisticated. There are some interesting problems such software faces, and Photomatix handles them relatively well. An interesting point in RC’s book is that the HDR software is only one step in producing a good image. Indeed, I used Lightroom, Photomatix, Photoshop, and Color EFEX Pro 4 all pretty heavily in the shot of Danielle above.

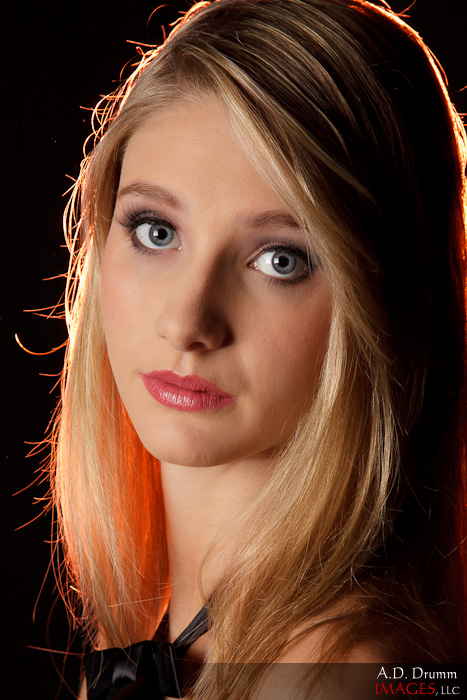
One of the problems I have with a lot of HDR photos isn’t the surreal nature of a heavily processed image, it’s that when all the detail is evened out and given the same level of importance in a photograph, the subject can become lost. We use light to guide the eye. When everything has the same relative intensity, we lose one of our powerful tools. For the alley photo, I made sure Danielle is given some brightness above her immediate surroundings. It’s also a fortunate composition in that there are tons of leading lines that take you right to her.

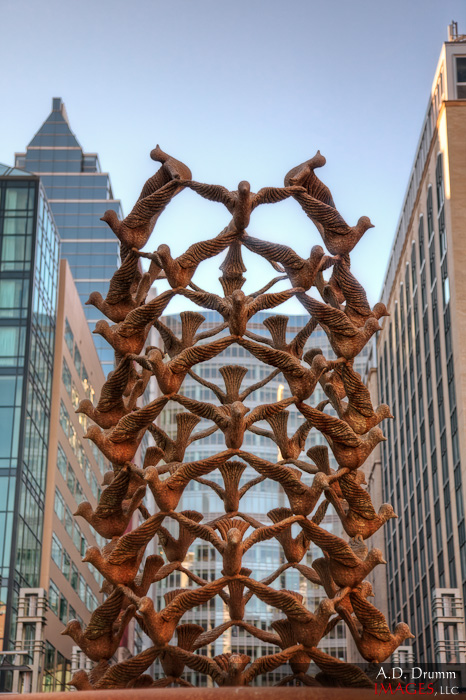
I thought it would be interesting shooting the Peace Plaza fountain in the late afternoon with a bright sky behind it. Leading lines again help out. There are some of the HDR issues here with the birds against the sky. There is some strong chromatic aberration which I was able to reduce but not eliminate. I don’t generally see much of that with my 24-105 lens.

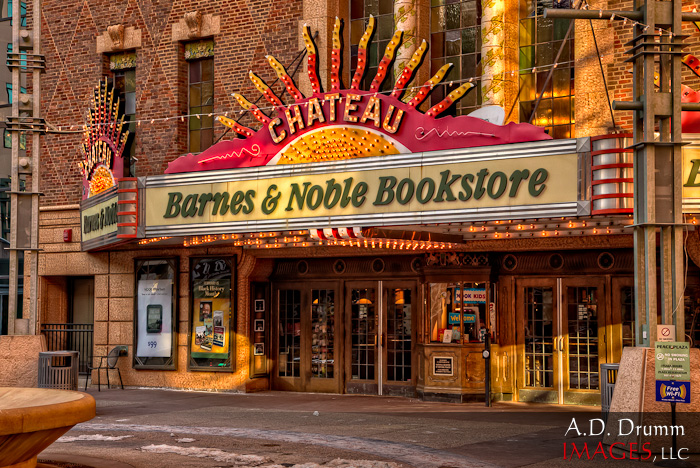
Next to the fountain is the old Chateau Theater now occupied by Barnes & Noble. You can see the fountain in the corner of the photo (which isn’t necessarily a good thing!). I’ve seen other local photographers do their HDR versions of this site. I’d rather shoot a less photographed subject, but it still makes an interesting HDR subject, and I thought I’d see what I could do with it. I tried several variations and I’m pretty happy with this one. I like the amount of detail in the door area, I like the color treatment, and I like that you get a hint of fading light.

I guess HDR is starting to grow on me. Using it with a people shot like the alley photo does excite me. It brings to mind possibilities I hadn’t considered before. We’ll have to see where this part of my photographic journey takes me.

February 19, 2012

Show Photos

Filed under: General photography,Rochester Civic Theatre — Tony Drumm @ 11:34 am

I shot two shows in the past few days. Rochester Civic Theatre was presenting The Lion, the Witch, and the Wardrobe as I’ve discussed in other posts. It was interesting to shoot and perhaps a bit more challenging than I expected. The costumes were colorful and interesting as was much of the lighting. But there seemed to be more scenes in which, from the camera’s point of view, the players and the backgrounds blended in a way that makes the actors not pop.

This is a case of the difference between our eyes and the camera’s sensor. Watching the live performance, this wasn’t an issue. Maybe it’s the sensor. Perhaps it’s motion. In shooting some basketball games recently, it’s been interesting to notice that shots with the ball on the ground in mid-dribble, the brain sees this and interprets the ball as lying still and motionless on the ground. An otherwise fantastic action shot becomes instantly devoid of energy. It’s really quite remarkable and easy to see when viewing two images taken in quick succession where the main difference is the position of the ball in the shot.

We can forget how our brain works with our eyes to create an image. Our brain interprets a 3D, live world very differently from a static photograph. As photographers, we have to think about this a lot. How to make the viewer see what we saw. An interesting aspect of this affects (especially) new photographers. When you look through the viewfinder, you will focus your attention on the subject. But in the flat, 2D photograph, things that your brain didn’t register as you snapped the shutter will be there distracting the viewer from your subject. The tree growing out of someone’s head. The smashed soda can on the ground. The other people standing behind the subject. I tell people to look around the entire view after composing the image for things like this. Still, even a seasoned photographer can fall into this trap in the excitement to get the shot.

With digital photography, we have an easier time of producing a photograph that tells the story we want. In darkroom days, we used many of the same techniques, but it was more work – and certainly more time consuming.

As tools improve, we can spend more of our time finding new ways to bring creativity to our art. We can try more ideas, and we’re not as invested in a particular choice. Undo becomes our friend.

At Riverland Community College, I shot their production of Ring Round the Moon. This was quite a contrast to the Narnia show – a single box set, period costumes, more conventional lighting.

More a story of love and trickery, there is plenty of emotion on stage to try to capture in my photos.

Having shot three shows there this season, it’s fun to see the student actors that I recognize from earlier performances. Unlike RCT, where I spend so much time and know so many of the “regulars,” at Riverland I’m still learning the faces. But it’s fun to see a familiar face like Penny in the wheelchair. When she appeared on stage, I was asking myself, is that really Penny? Yep.

This was probably one of my favorite shots of the night. We get the sense of action and motion. And all I had to do was to grab the shot! The expressions, the arms, the pieces of ripped-up money. Makes me grin.

When the show was over in Austin, I walked out to my car to find that, although the snow had seemed to end earlier, it was back. I90 was sort of a mess. But I managed to make it home without incident!


February 11, 2012

Rick Sammon Workshop

Filed under: General photography — Tony Drumm @ 9:41 am

This past week, I flew down to Tampa for a workshop given by Rick Sammon as part of Dave Cross Workshops. Rick is a Canon Explorer of Light and a fabulous teacher. The focus of the workshop was lighting, but I was hoping to experience Rick’s approach and vision. I’m pretty comfortable with lighting, but every photographer sees differently, uses the light a little differently, composes a scene differently.

We shot in Dave’s studio as well as in a few outdoor settings. Many times, Rick would ask what do we want to shoot? Who has an idea? We’d use ambient light or bring in some light as needed, or we’d try both.

We played with some backlighting and more than once with gels. I love gels – they can add so much drama to a shot. I can remember one shoot where I had used gels for a set of photos then removed them. The lighting looked so plain then! Sort of like eating a spicy dish followed by a piece of white bread.

Our models, Ashley the first day and Danielle the second, are both dancers and were great at taking directions. Dancers make wonderful models as they are very aware of their bodies and they are strong. Our models dance at the studio where Ricky Jaime, who was on So You Think You Can Dance recently danced and taught.

We took Ashley to a park on Tuesday after pretty much a morning of rain. It was cool and her light dress wasn’t very good at keeping her warm, but she didn’t let that interfere with her job. We were all impressed.

Rick thought Dave’s red car would make a great backdrop, so we moved the other vehicles and shot Ashley in or just outside the car. This picture came to my mind, so I had her stand by the car using my phone as a prop.

We moved to a roadway that curves into a beautiful archway of trees. The cloudy skies were actually good for us, giving us nice even light which we sometimes aided with a pop from a strobe. While we were getting ready, Ashley covered up a bit to warm up. When she looked up toward the sky, the light worked wonderfully with her face. I like this shot better than any of the more staged shots I took there.

On Wednesday, we shot on location first, driving into Ybor City. This was once the largest producer of Cigars in the world, shipping up tobacco from Cuba, with many Cuban and Italian immigrants. I had spent a little time there on Sunday looking around. There’s a nice museum I enjoyed.

There’s an alley filled with graffiti where we did a lot of our shots, but we noticed this brick wall and some cool shadows. We had tons of sunshine, much different from the day before. I liked the way the red glow from the bricks worked with Danielle’s skin tone.

In the shade of the alley, we could use the strobes to create whatever light we wanted. I love watching other photographers work. If you’ve ever done a brainstorming session, it works like that for me. I’ll see what one person does, and I’ll suddenly have an idea that plays off of that, sometimes in a very different way. I wanted this shot to look like Danielle is standing in a street light. Looking at it later, the light and the textures suggested a black and white treatment to me.

But much of the graffiti was very colorful, especially this section with lots of reds and yellows.

Back in the studio, we made use of Dave’s seemless background. Rick had a homemade grid effect, and it was time to use some gels again. It was rather amazing how quickly we found the right settings to produce a fairly dramatic photo. Again, working with a dancer is great. She would find a pose like this and about all we’d have to do is have her move an arm this way or that.

Rick then suggested doing a silhouette. We played with the size of the lighted area and with Danielle’s arms.

It was all over too quickly, and it would be back to Minnesota with me. It’s been an unusually warm winter here, but it’s certainly not Florida! I had fun wandering around a bit before the workshop and seeing my niece Claire and her husband who graciously offered to put me up while I was in Tampa. And, RC Concepcion gave me a tour of Kelby Media’s building down the street a few doors from Dave’s studio. Then on Wednesday after the workshop, I stopped by again to watch the live webcast of The Grid Live with Scott Kelby, his wife Kalebra, and RC.

All in all, a fun experience!

Powered by WordPress