I have been using Adobe’s Lightroom program for managing my photo library and processing my RAW files since the original beta version in 2006. It’s sort of the center of the universe for my post-processing work on my images. Over the years, I’ve seen it be vastly improved, especially the editing features.
Adobe just released their newest version – or versions. There are two now, Lightroom 6 and Lightroom CC, both of which are nearly the same for now. There were not a ton of new features in this release. One of the new features is HDR – short for High Dynamic Range. This is a method for handling situations with a larger range of light intensity than our cameras can handle. It’s a form of what’s sometimes called computational photography – using software algorithms to operate on the image data.
HDR gained popularity a few years ago. It became something of a fad as many new things do – suddenly everyone doing it – in part because it can produce rather extraordinary images. And, extraordinary doesn’t actually mean good. Grungy detail and eye-splitting saturated colors became sort of the rage producing what some call the “HDR look.”
However, it does solve something of a problem we sometimes face. It’s often used by architectural photographers and others. The approach is basically to take a set of photos, each at a different exposure, then let the software combine those into one image. Photographers have been doing this manually using masking in Photoshop for years. HDR software can simplify the process and apply it more globally.
Now, we can do this right in Lightroom. One big difference between Lightroom’s feature and dedicated HDR software (or even the rather rudimentary capability in Photoshop) is the lack of options. The idea, it seems, is you produce the merged photo then adjust it in Lightroom’s develop module like any other photo.
I’ve been playing with it, comparing it to Photomatix – my go-to HDR program – and seeing what it can and can’t do. How might I use it?
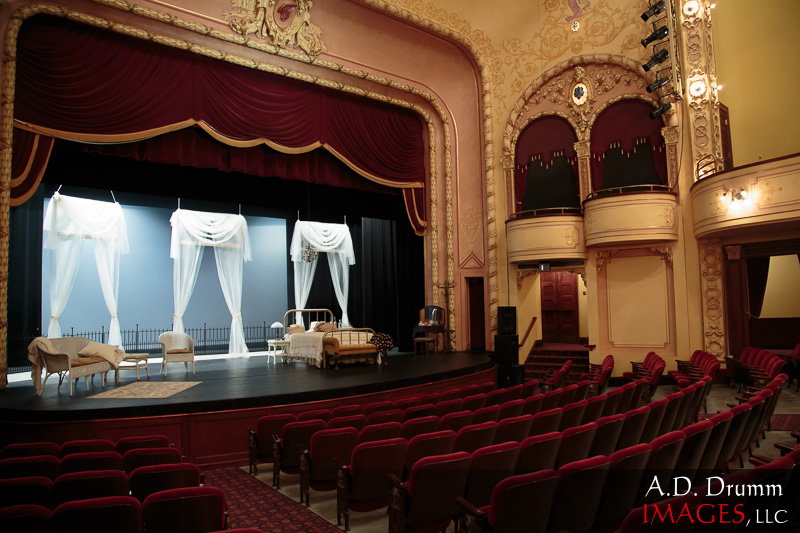
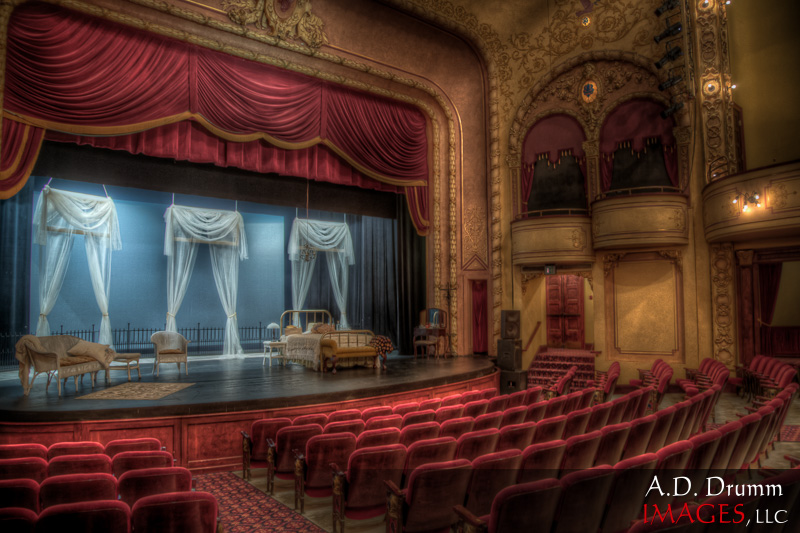
The photo above is one of a series of seven exposures I took inside a beautiful theatre in Red Wing. It’s a decent exposure, and you can see the wide range of brightness from the stage lights to the dimly lit seats. I shot these hand-held, so the lightest exposure of the seven was at a slow shutter speed and has quite a lot of motion blur. So, I’m going to exclude it. The next-brightest image has a lot of good detail in the shadows, so I think it’s just fine using the six remaining photos.
(Be sure to click on the images to see them larger. Sometimes the in-line smaller size will look a little blurry or otherwise not great!)
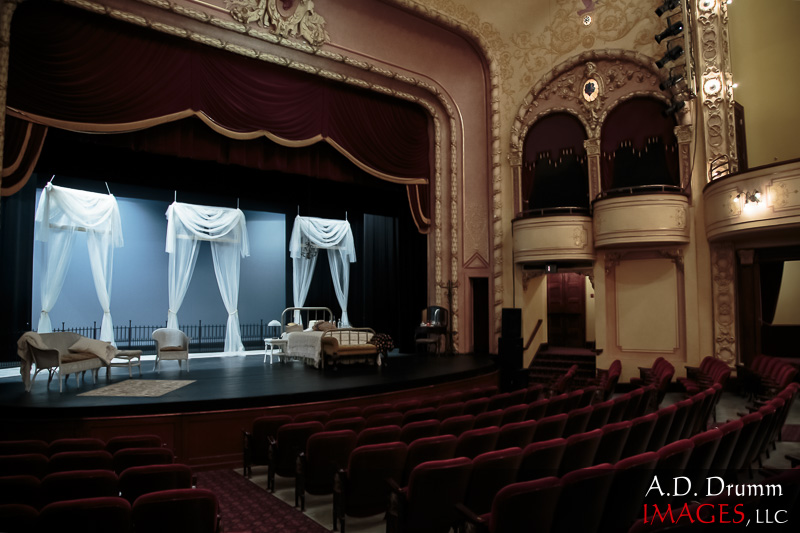
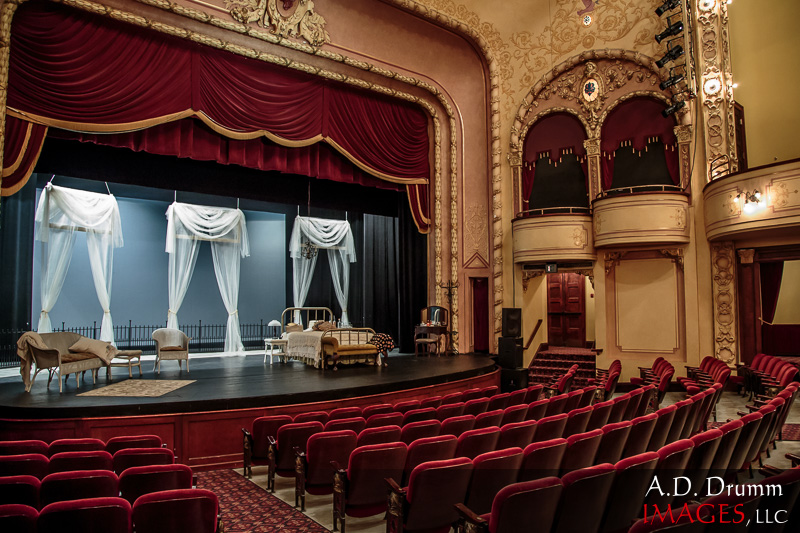
This is the result from Lightroom’s merge HDR. It produces a DNG file similar to a RAW file. Adobe says it’s 16-bit, and the develop module exposure setting can adjust from -10 EV (or stops) to +10 EV. Out of the box, it seems quite dark. As I experiment with the settings, I find that the shadows slider – one I generally find less than useful except in certain circumstances – works amazingly well here. And I had to just try it to figure that out. The highlights slider – which I use a lot – has less impact than I’m used to. Anyway, after adjusting it a while, I ended up with the next image.
Comparing this to the original single file, it’s actually quite similar. The overall tone is nearly the same, but you can see we’ve opened up the shadow areas quite a bit. I’m sure I could vary the look quite a bit using the sliders more.
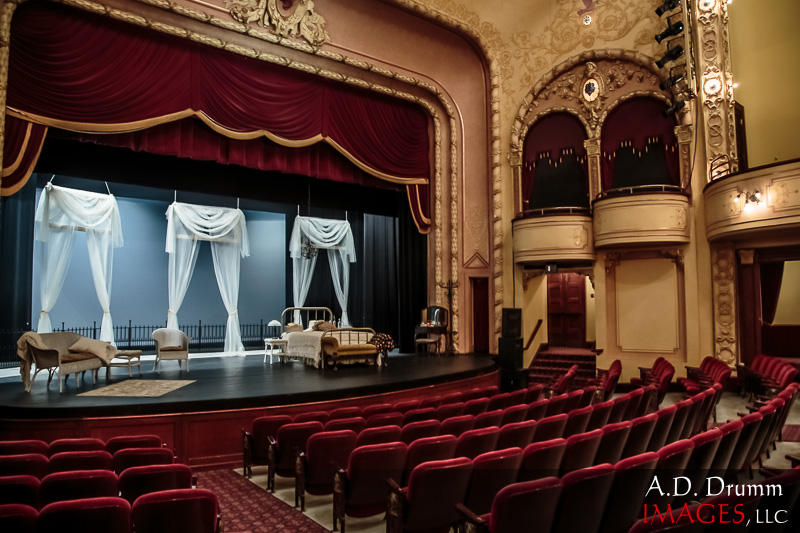
Now, to make it interesting, I take this adjusted image and see what Photomatix will do with it. Although Photomatix is designed for merging and blending several photos, it can apply its methods to a single image as well. I started with the settings I’ve used for indoor (church and theatre) images before, then adjusted them to taste.

You can see that Photomatix approaches the detail and shadows differently and produces a different look. Shadows in particular are opened up quite a bit more. The shadow contrast is different, too. I then took this result into OnOne’s Perfect Effects to apply slightly more mid-tone contrast and a tiny bit of glow. Then, I did some finishing touches in the Lightroom develop module, partly to reduce the saturation a bit and pull more focus onto the stage. (Uniform brightness and detail can be the killer of HDR photos as they lose a place for the eye to go.)
Some of these changes are subtle, especially at this size. But subtle changes can make or break a photograph.
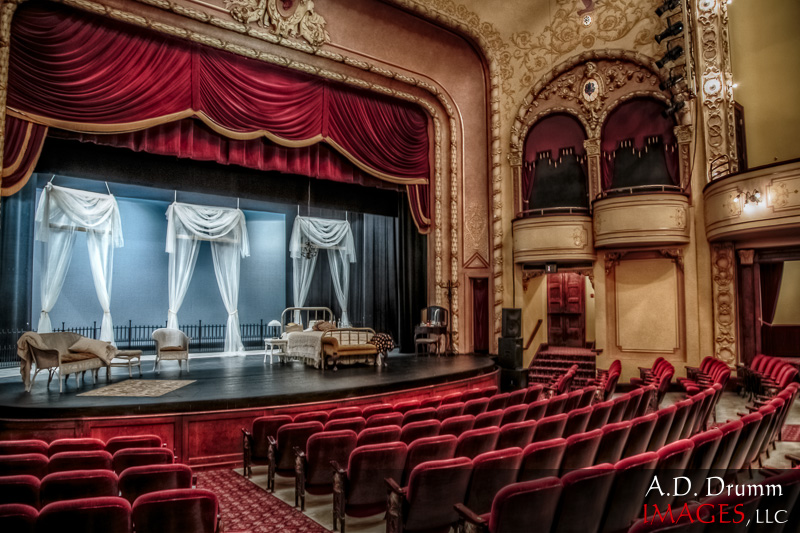
For comparison, the image above is made using the same six photos directly merged by Photomatix. I did some minor tweaks in Lightroom to produce this final image. One final version now…
This one is made using just the single exposure we started with up top. I adjusted it in Lightroom, mainly adding contrast and bring out the shadows. It’s not a bad rendering, but I like having a bit more detail available in such situations. Look at the paneling below the stage to see some of the difference.
Conclusions? Well, the Lightroom HDR feature is workable. Adjusting its results in the develop module works okay, especially regarding the ability of the shadow slider to bring out shadow detail. I think I’d like having the option to produce a larger 32-bit file. Speed wasn’t bad. Not great either. Since there’s really very few options, it can be run “headless” where it doesn’t even ask about the settings and completes in the background, letting you continue to fiddle with other things in Lightroom.
Note that I did not turn on the “Auto tone” setting. This seems to be exactly the same as hitting the Auto button in the Basic settings. I don’t like it there, and I didn’t like it for HDR either.
Using Photomatix as a filter or one or more other filters – or other similar approaches using Photoshop – can produce an interesting and quite usable final image.
This test used an image with nothing moving. When things move, they can be in different positions from one image to the next. Then, the software has to figure out what to do. It creates what are called ghosts, spooky looking double or triple or more exposure sorts of areas where the moving thing appears more than once. Thus, the method to reduce these is called de-ghosting or ghost removal. There is a setting for this in Lightroom’s HDR – it’s the only one with more than just on/off.
Typically, you might see this show up as leaves blowing gently in the breeze. I sometimes take HDR series of scenes including people. People are bigger than leaves and can move quite a bit, especially for interior shots where light is dim and exposures are long. Photomatix does a fair job handling ghosts in general and people in particular. People are still a problem, but it gives me a reasonable starting point from which I can use Photoshop to fix things up. Lightroom? I’m not sure what it is doing. In one test, it didn’t even notice all the moving people. It found ceiling fans and decided to stop them (using the shortest exposure). And the people were a mess. It gave me noisy poorly rendered areas about three times the area of the slightly moving person with bad color. I would have a lot of work to do to recover. None of the provided options would improve things. So, for now, if there’s movement and especially humans in the shot, Lightroom’s HDR is a non-starter for me.
So, there you have it – one little study of this new HDR feature built into Lightroom (as well as its sister program, Adobe Camera Raw). I’d say there are possibilities there. I may play with it more in the future. We’ll see where Adobe takes this.