I thought it might be fun to set aside my normal blog subjects and do something more like a tutorial on some aspect of shooting. What better day for a tutorial than Tuesday, I reckon!
The subject for this little tutorial is depth of field, or maybe, aperture. We often like to refer to an exposure triangle made up of shutter speed, aperture, and ISO. These three settings work together as a team to determine the exposure of a photograph. How bright or how dark the image is. What settings should we use? I could devote a rather lengthy blog post or two or many on exposure.
But today, lets just discuss aperture. This setting, in many ways, is arguably the one that sets the tone and emotion of most photographs. It’s really that important. I prefer to shoot in manual mode to control all three settings directly, but many pros rely heavily on Aperture-priority automatic mode. They want to take advantage of the terrific technology we hold in our hands, but controlling the aperture is considered critical.
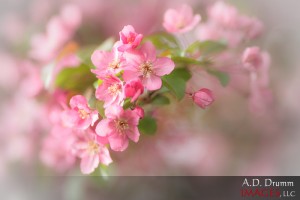
When the aperture value – the number – is low, the opening allowing light through the lens to the sensor is large. This produces a shallow depth-of-field or depth-of-focus (DOF). That’s what I used for the photo of the blossoms above – the largest opening I could with that lens. In this case, it was f/2.0. Shallow DOF means very little is in focus. As we stray closer or farther from the camera, things become blurry.
Why is that important? We suffer in photography from having a 2D static image to present our viewers a glimpse into something we saw, something we felt. Having only the main subject in focus helps to pull the viewer to what we want them to see.
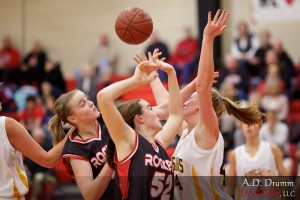
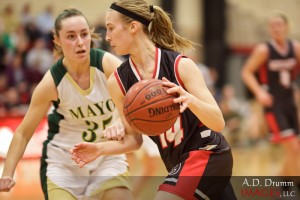
Sports shots are great examples. Why do the pro photos in sports magazines look so much better than the common shots we see of local sports? A big reason is making use of shallow depth of field. We don’t really want to showcase the spectators in the stands behind the players. We don’t even really care about the players back away from the action. By using a shallow DOF, we keep the focus – literally – on what’s important.
Aperture is key here. However, it’s not the only thing that determines the DOF. The lens makes a difference. A long telephoto lens tends to produce shallower DOF than a short wide angle lens at the same aperture setting. And, the farther the subject is from the camera, the wider the DOF. Photographers who shoot close-ups often have to struggle to achieve a DOF wide enough to keep all of the subject in focus.
Also, some lenses have a smaller maximum opening. We call those slower lenses and those with a larger maximum faster lenses. Faster lenses are more expensive. Sometimes, they are hugely expensive. They are harder to make especially to make well – meaning they produce good quality images.
We don’t always want shallow depth of field, either. We can shoot a portrait with one eye in focus and one eye out of focus. It’s a choice and it sometimes is what I might want. But not always. So, knowing how aperture, distance, and lens combine to produce the DOF I want is important. And, you can see that maybe it’s something I don’t want to leave to the camera to decide. It just doesn’t know what I’m actually trying to do.
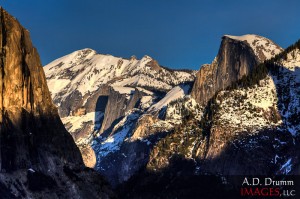
Commonly, we’ll use a wide DOF for landscape images. Not always, but often. We might use f/11, f/16, f/22. Remember, larger numbers mean smaller opening and wider DOF.
And for an environmental portrait, a wide DOF might be appropriate. We want to showcase the environment, show how our subject really is in this place and what that place is. We’ll use other techniques to pull the viewer to the subject like leading lines above (which all lead to the subject).
DOF really is one of the keys that takes your photos from snapshots to a level above, photos that just look better. When you’re looking at good photos, ones that pull you, make you go “Wow!” – take a moment to study how the photographer achieved that. How was DOF used to make the photo better?
Next time you’re shooting, take the camera off auto-everything or even “P” (for program – not professional!), and set it to aperture priority (Av for us Canon shooters). Set an aperture and shoot. Change it up, shoot some more. Try using the largest setting your lens offers for a while shooting nearby subjects, far away subjects. Learn how this one setting affects your photos.


Thanks Sir keep writing..
Comment by Aniket Deshmukh — June 27, 2012 @ 7:56 am